Blender 4.5+ Extension
3DQuads Print Ready
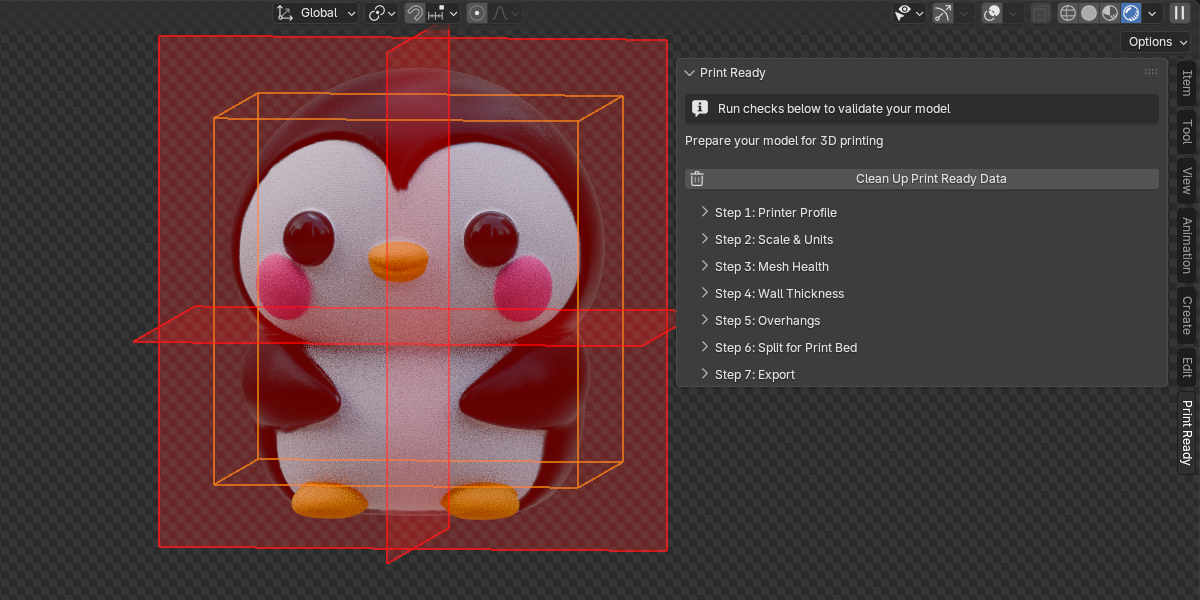
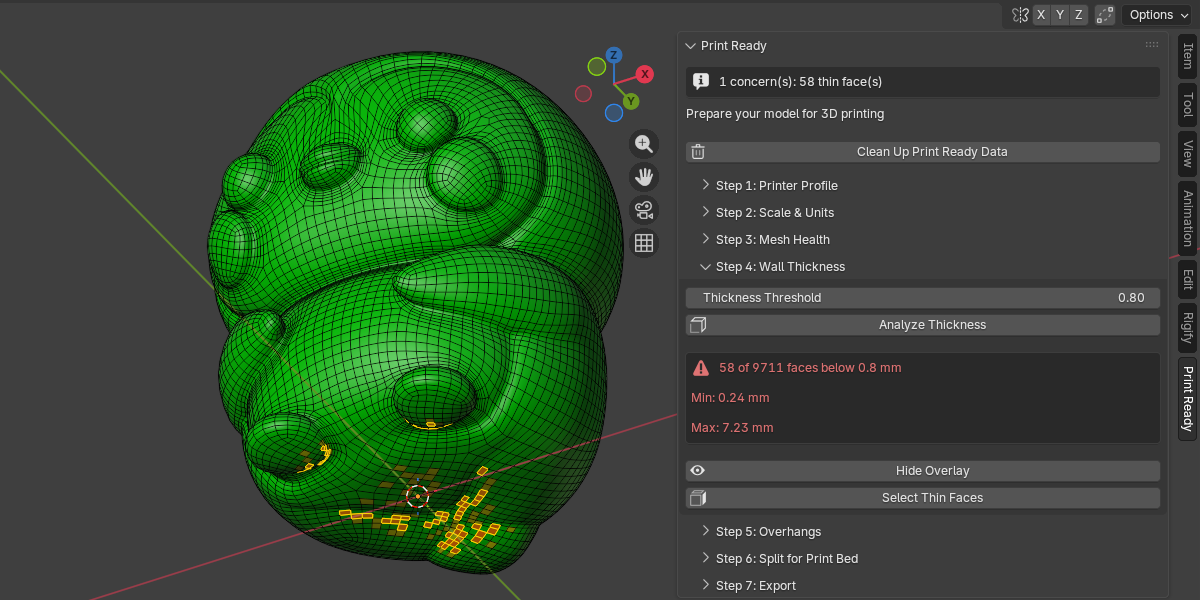
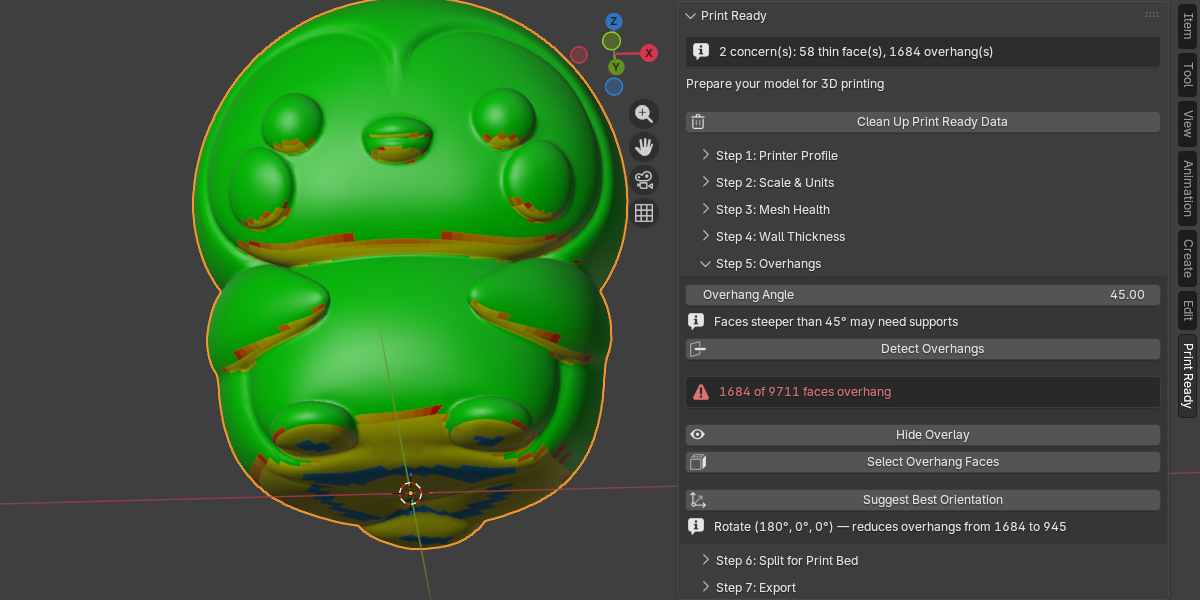
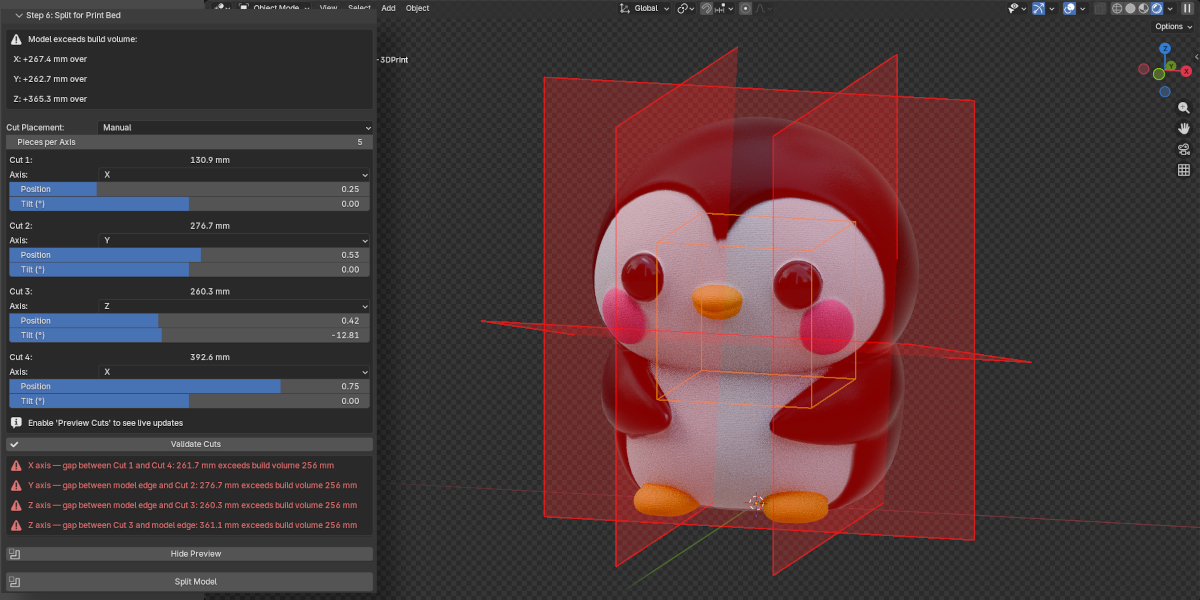
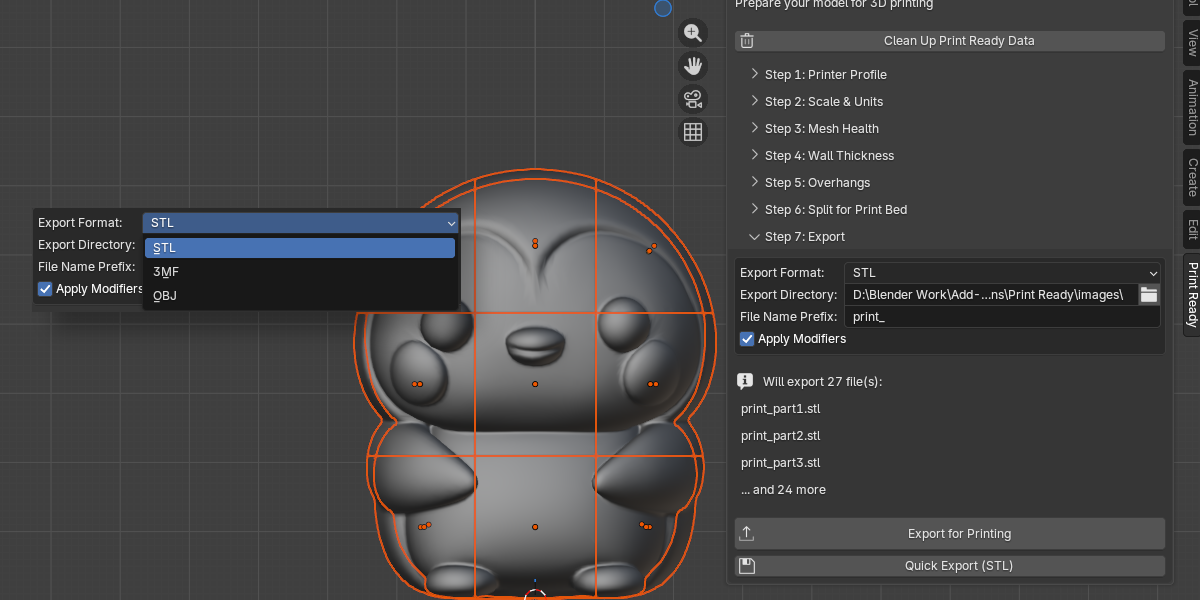
3D Print Preparation
Done Right
The complete pipeline that takes your Blender model from raw mesh to printer-ready export — step by step, without leaving Blender.
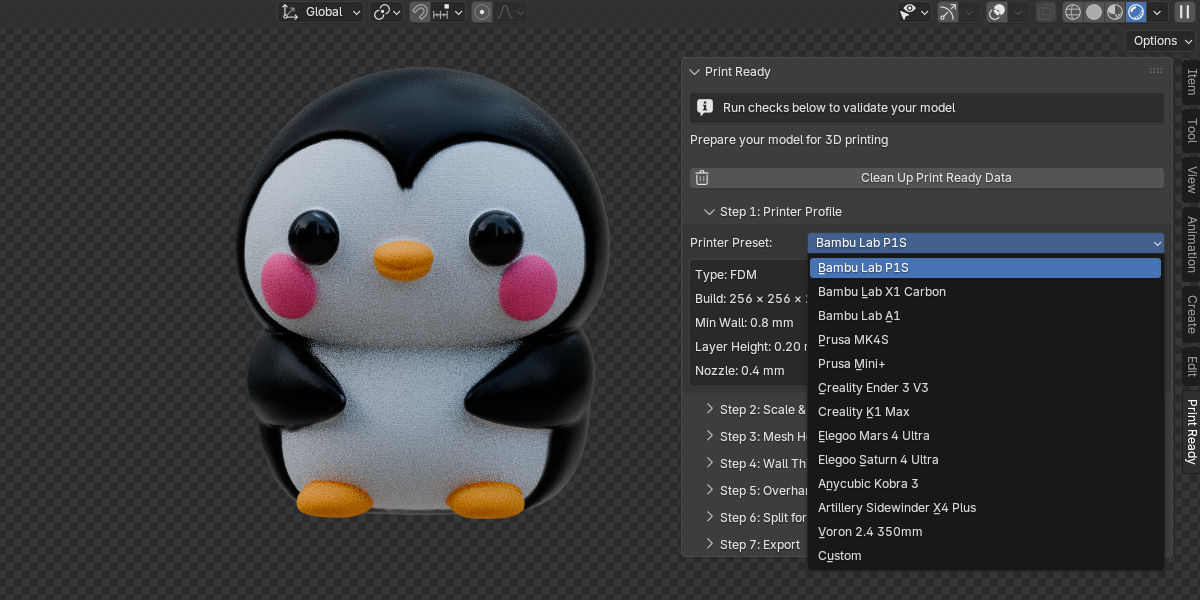
See All Features View Documentation13+ Printer Presets
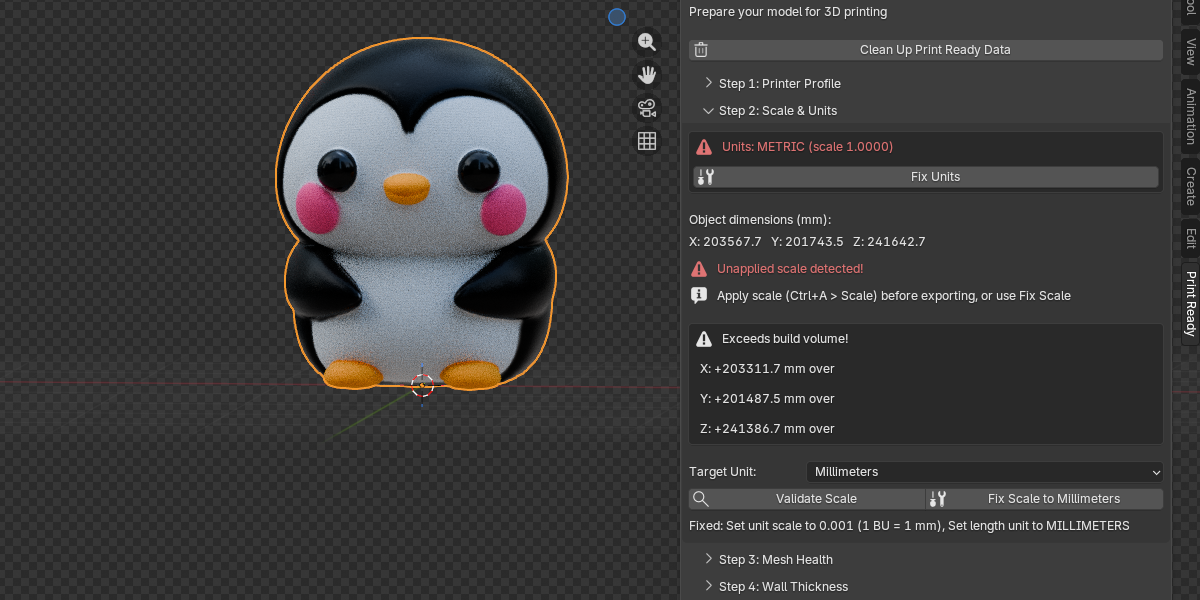
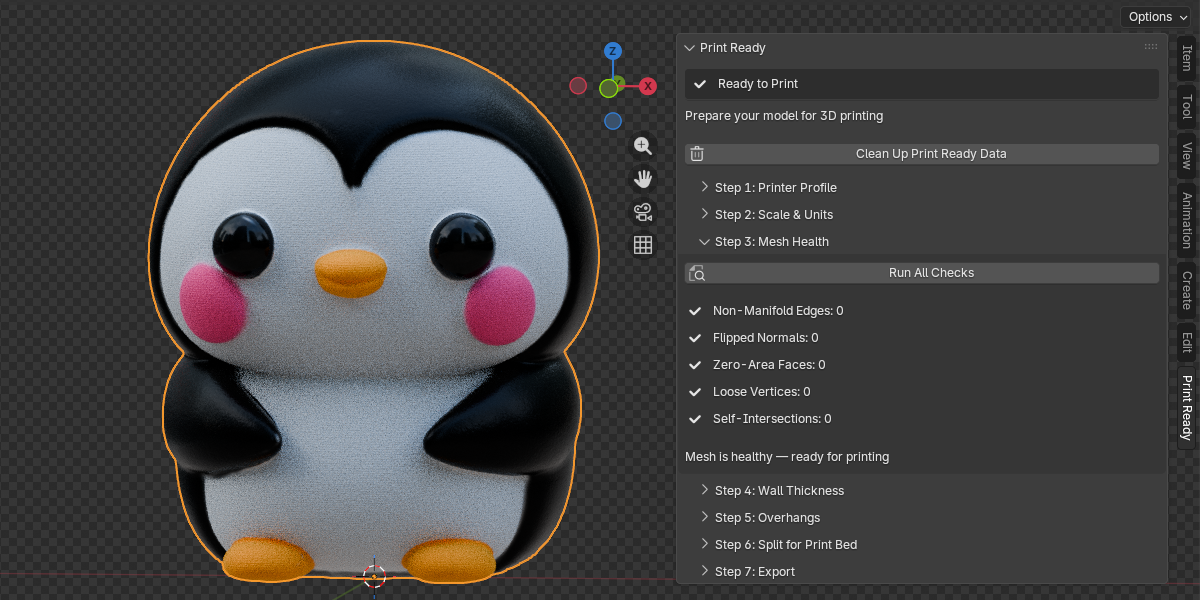
7 Guided Steps
0 External Dependencies
Blender 4.5+ Ready